Salutations, Junior Professors!
Professor Togglebutton here, welcome to our second class. I know it’s been a while but let’s crack on, shall we? Today we will be covering how to use an addon called Total Roleplay 3: Extended to create documents and share them with your friends, allies, and enemies. You’re probably thinking to yourself, “Professor, you worked on another addon for items, why are you teaching us this one?” Well, my pupils, I may prefer Gryphonheart Items, however the original author has retired and left a heap of code that can’t be maintained. Let’s get started.
DIFFERENCES BETWEEN TOTAL ROLEPLAY 3: EXTENDED AND GRYPHONHEART ITEMS DOCUMENTS
The main difference in these two is the ability to customize TRP3E documents, or the lack of it. GHI had the ability to add Guild Crest icons, which TRP3E does not. GHI also had the ability to customize the paragraph, and heading fonts with typeface, color, and size. You do not have that choice in TRP3E, and are limited to special fonts defined by the UI. These fonts can be changed on the end user’s side, meaning those who read it will not necessarily see the same thing as you see it. You are also, by default, limited to 3 choices. This can be changed easily enough with a spot of code, but that’s beyond this. Just remember that for now, you are limited to the 4 fonts, 1 main heading, 2 subheadings, and one body.
Where TRP3E documents shine though is their ability to produce dynamic documents. You can use variables and codes to get data from character profiles in TRP3!
CREATING BASIC DOCUMENTS
After opening the item database like in Lesson 1, click the new item menu and choose document.
That’s it. Really. It does the work of setting up the internals for you. You can go right to work writing ransom notes or recipies.
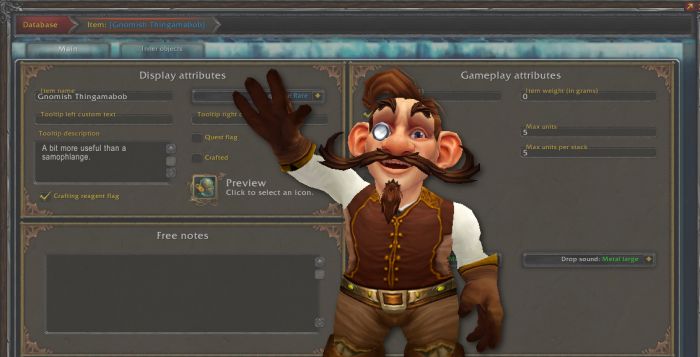
Setting up the Basic Item
After making the document item, you should set the basic stuff about the item, like in our last lesson… from 3 years ago…
Opening your Document
To edit the document’s text, you need to locate its Inner Object in the Inner Objects Tab. Then, click on the document to open the document editior.
Editing the Contents
The Document UI is not complicated, not with the limited variety of items you can include. Each of the buttons above the edit box adds tags to the document at the location of the cursor. Image and Icon buttons have UIs for picking the graphics. You will need to either manually add markup tags or you can click the buttons, place your cursor between the tags and type. The edit box DOES NOT MAINTAIN FOCUS when you add a tag with a button and you will have to click in it to type again.
My UI is hacked a bit, so there are fonts on the left you do not have by default. Relax. It’s no big deal.
Sample Text
{h1:c}Don't Panic{/h1}
{h2}Check for your Towel{/h2}
{icon:inv_misc_clothscrap_02:25}
{h3:r}{col:ffffff}Instructions{/col}{/h3}
{img:Interface\Pictures\artifactbook-warlock-cover:256:256}
{col:ffff99}
{link*https://trg.network*TRGN Website}
{/col}
Above is the sample text I entered. It has an example of each kind of tag.
Tag Reference
Block elements
These elements cannot be nested.
{h1} {/h1} {h2} {/h2} {h3} {/h3}
The headings. Use them to organize your document. Can have alignment appended: {h1:c} for center H1, {h2:r} for H2 right aligned. No appended letter means left alignment
{p} {/p}
Paragraph text tag. Only needed if you intend to append :c or :r to center or right align it.
{icon:IconName:SizeInPixels}
Add a game icon, IconName is the name of the icon, SizeInPixels is what it says on the label…
{img:FilePath:Width:Height}
FilePath is the directory path for the image. This is handled by the UI. Unless they forgot to add it to the browser. Then you can do it manually. (Useful for new images for recent patches) Width and Height are that in pixels.
Inline Elements
These can be nested inside block elements.
{col:RGBHexColor} {/col}
Colorize the text in between the tags. This is the only way to colorize text until fonts can be set manually. RGBHexColor is a Hexadecimal RGB code, just like on the web.
{link*URLorWOrkflow*LinkText}
URLorWokflow will open a box with a URL to copy and paste manually to your web browser. It can also execute another action (Workflow) in the TRP3E item. LinkText is the text that displays in the link, automatically in square brackets.
Variable Tags
TRP3E has the ability to have variables stored in an item and those variables can be recalled within a document.
${variableName}
Simply enter the tag as formatted above with the variable’s name. There are also a list of set variables you can call on for things like profile data.
For instance: ${trp:target:full} will insert the reader’s target’s full name from TRP3.
Check out the TRP3 WIki for more.
TRP3E Wiki: Variable Tags
For even more advanced stuff, see this overview of how to make dynamically updating documents.
TRP3E Wiki: Documents Overview
Finishing Up
SAVE YOUR FREAKING WORK WITH THE BUTTON AT THE BOTTOM.
Now you can add the item to you inventory and open it. See the last tutorial for that.
See you next time!
Comments
No Comments